Organizations let your team share API keys, billing, and usage under a single account.
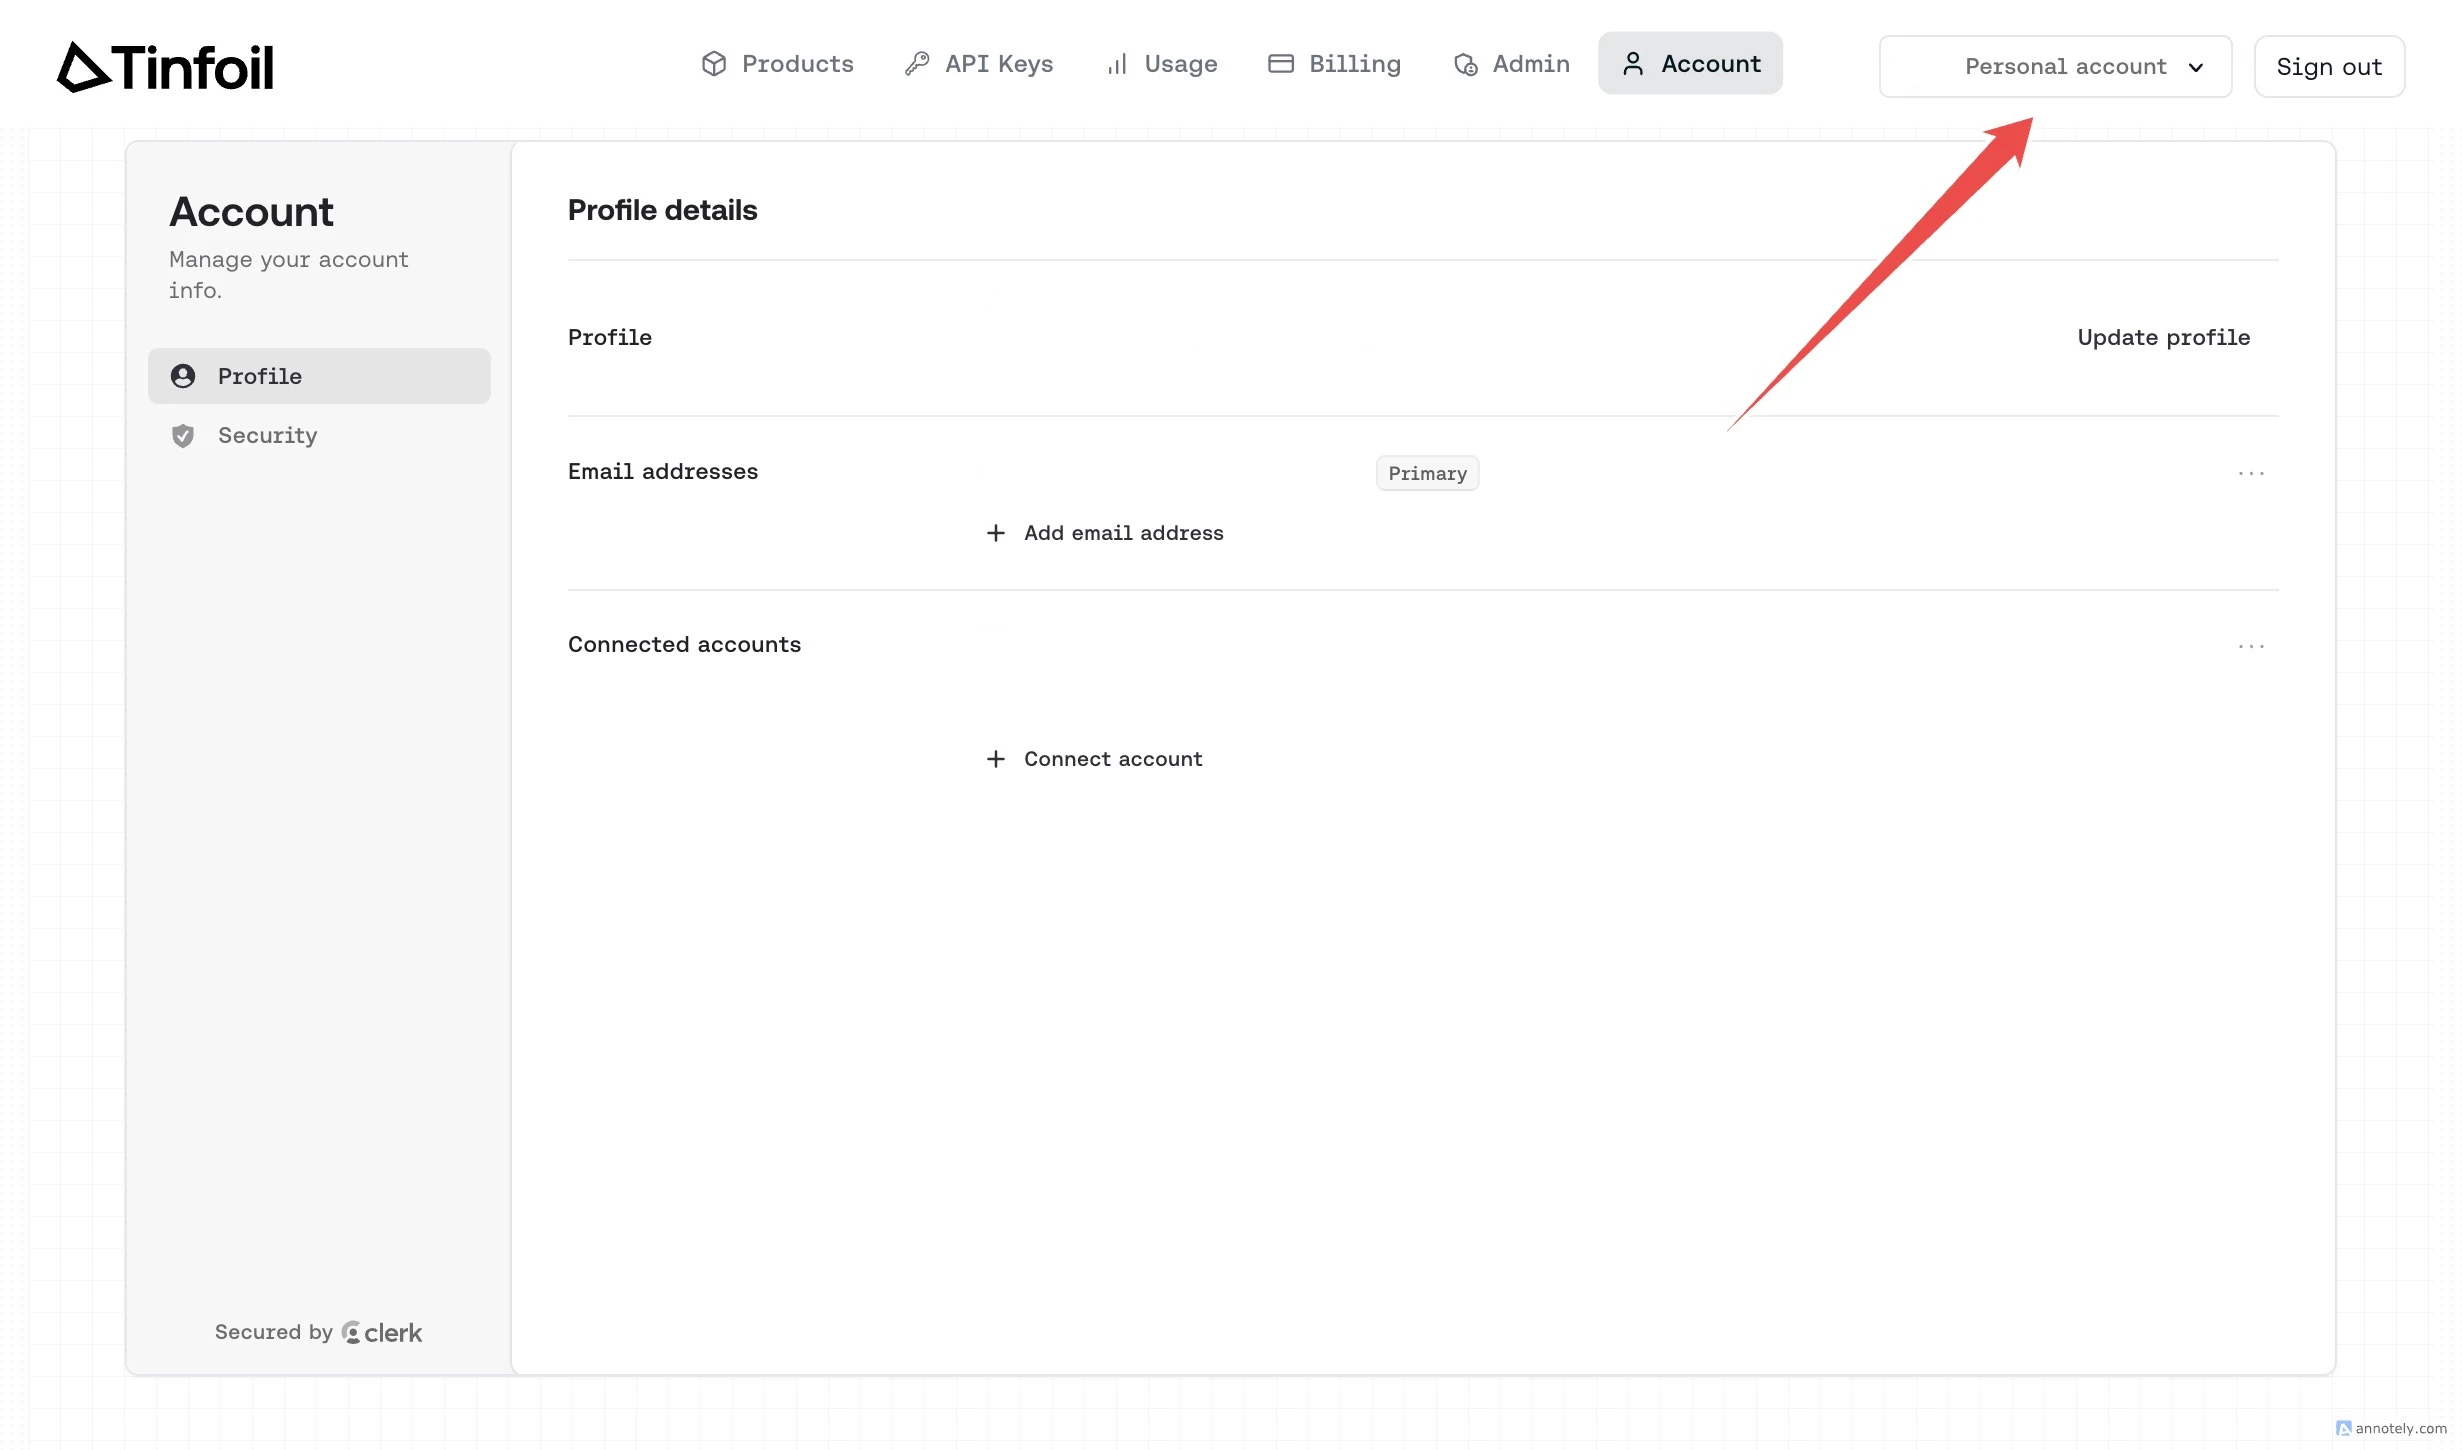
Step 1: Open the Account Switcher
From the dashboard, click the “Personal account” dropdown in the top right corner.
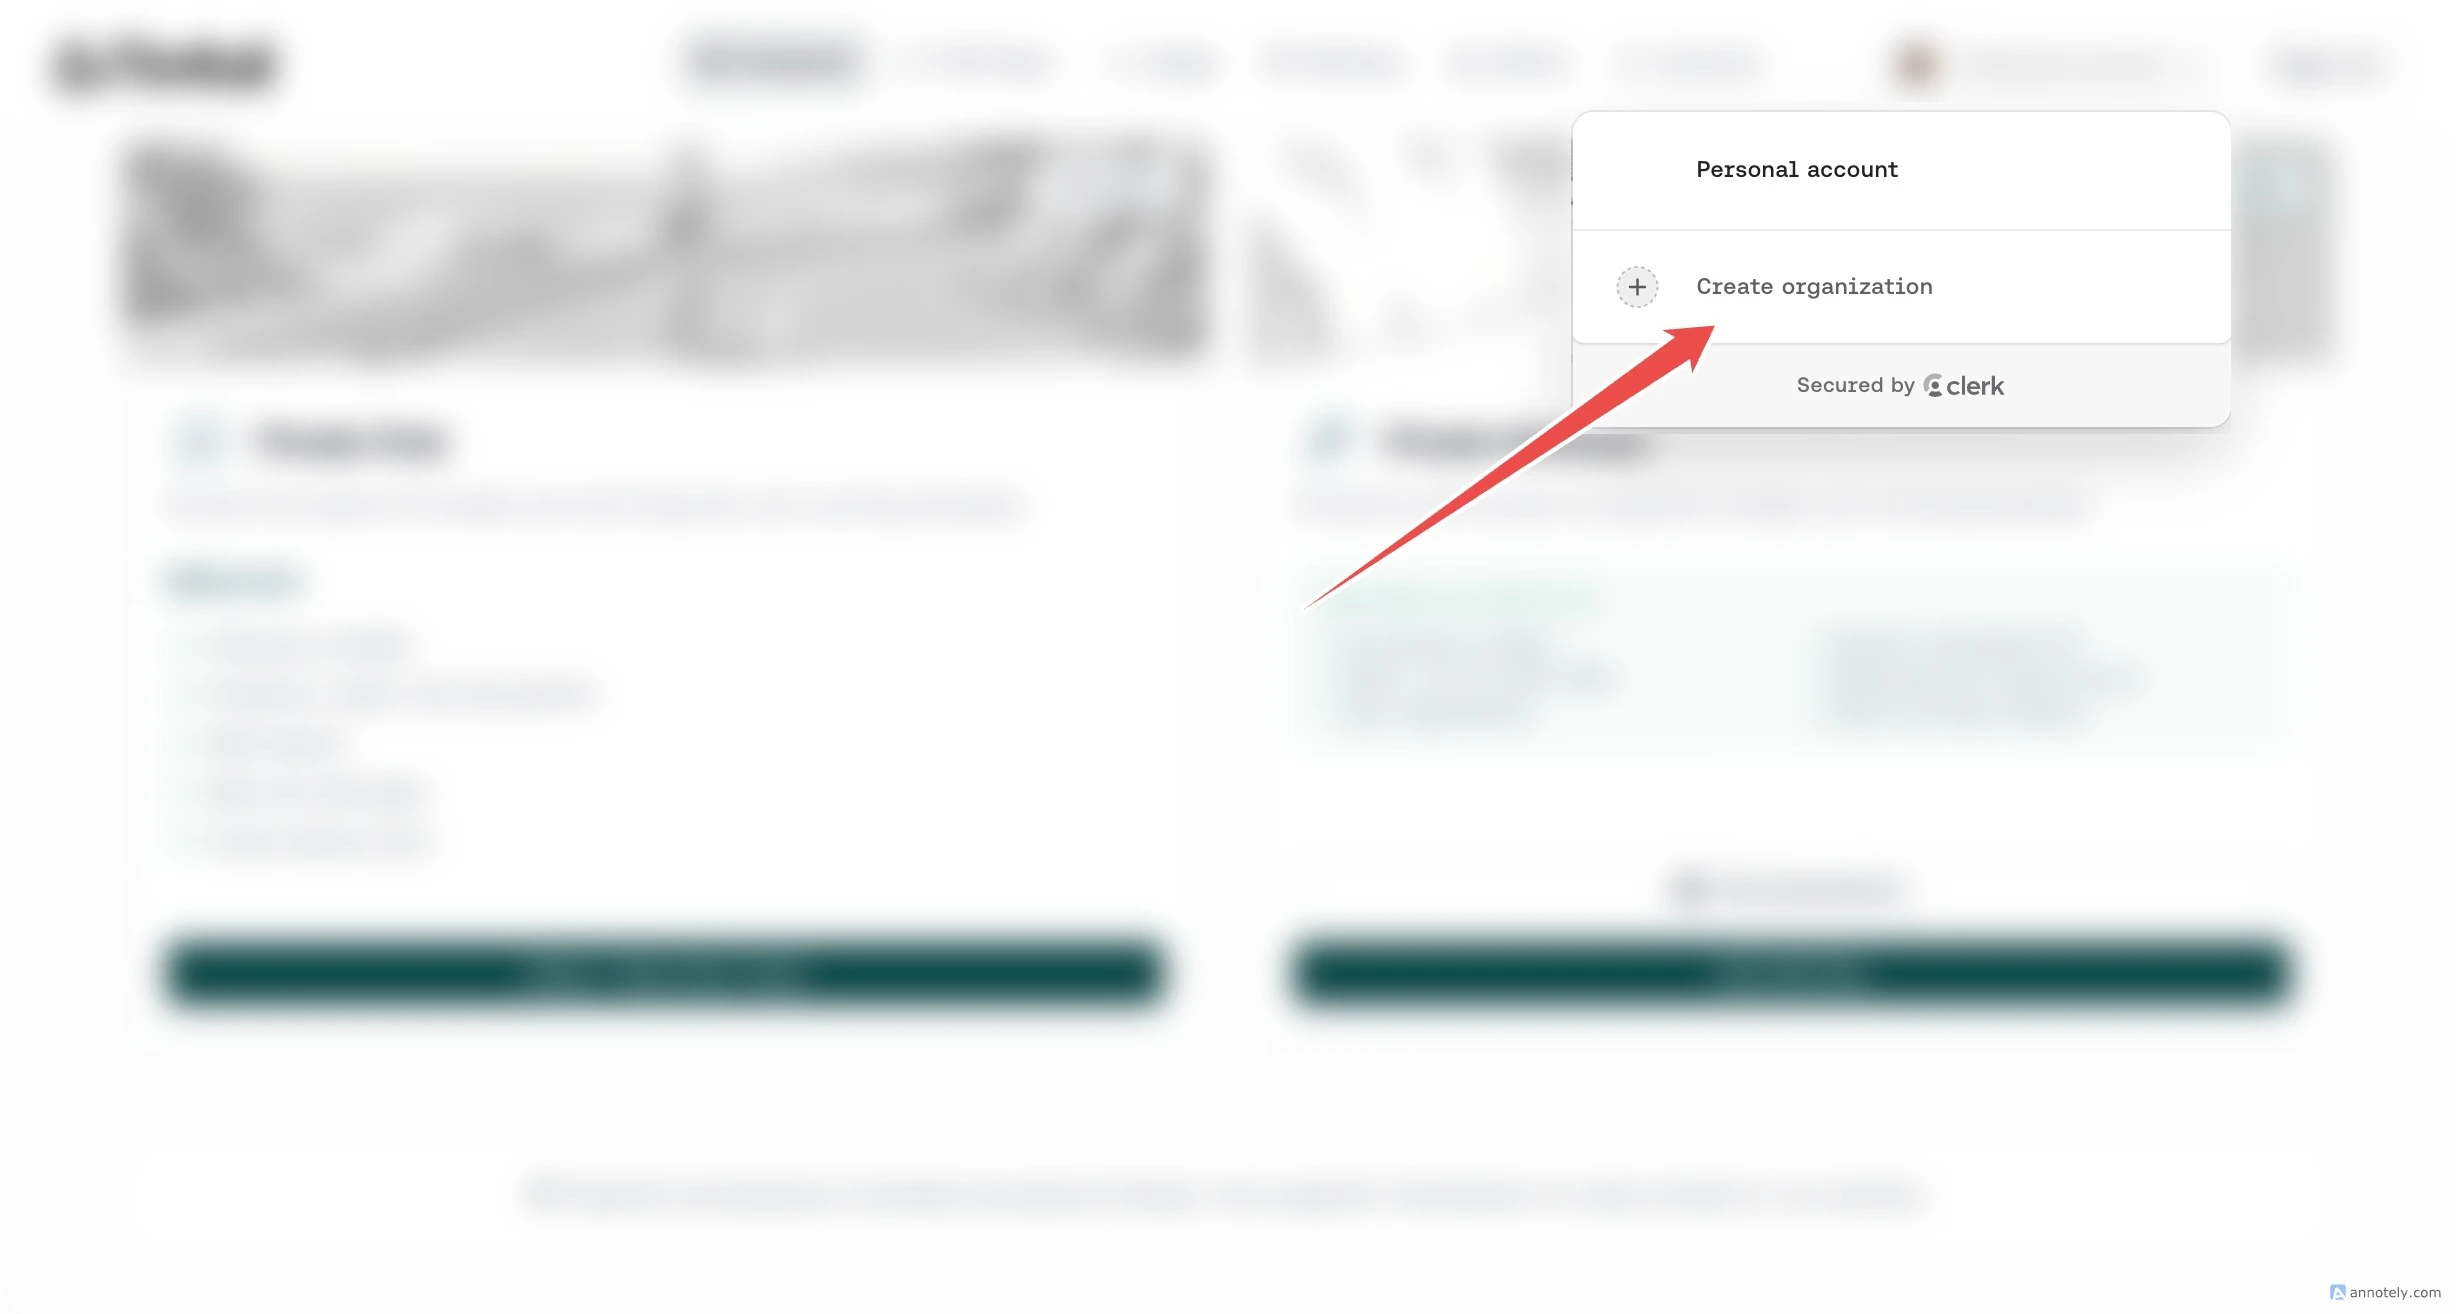
Step 2: Create Organization
In the dropdown menu, click “Create organization”.
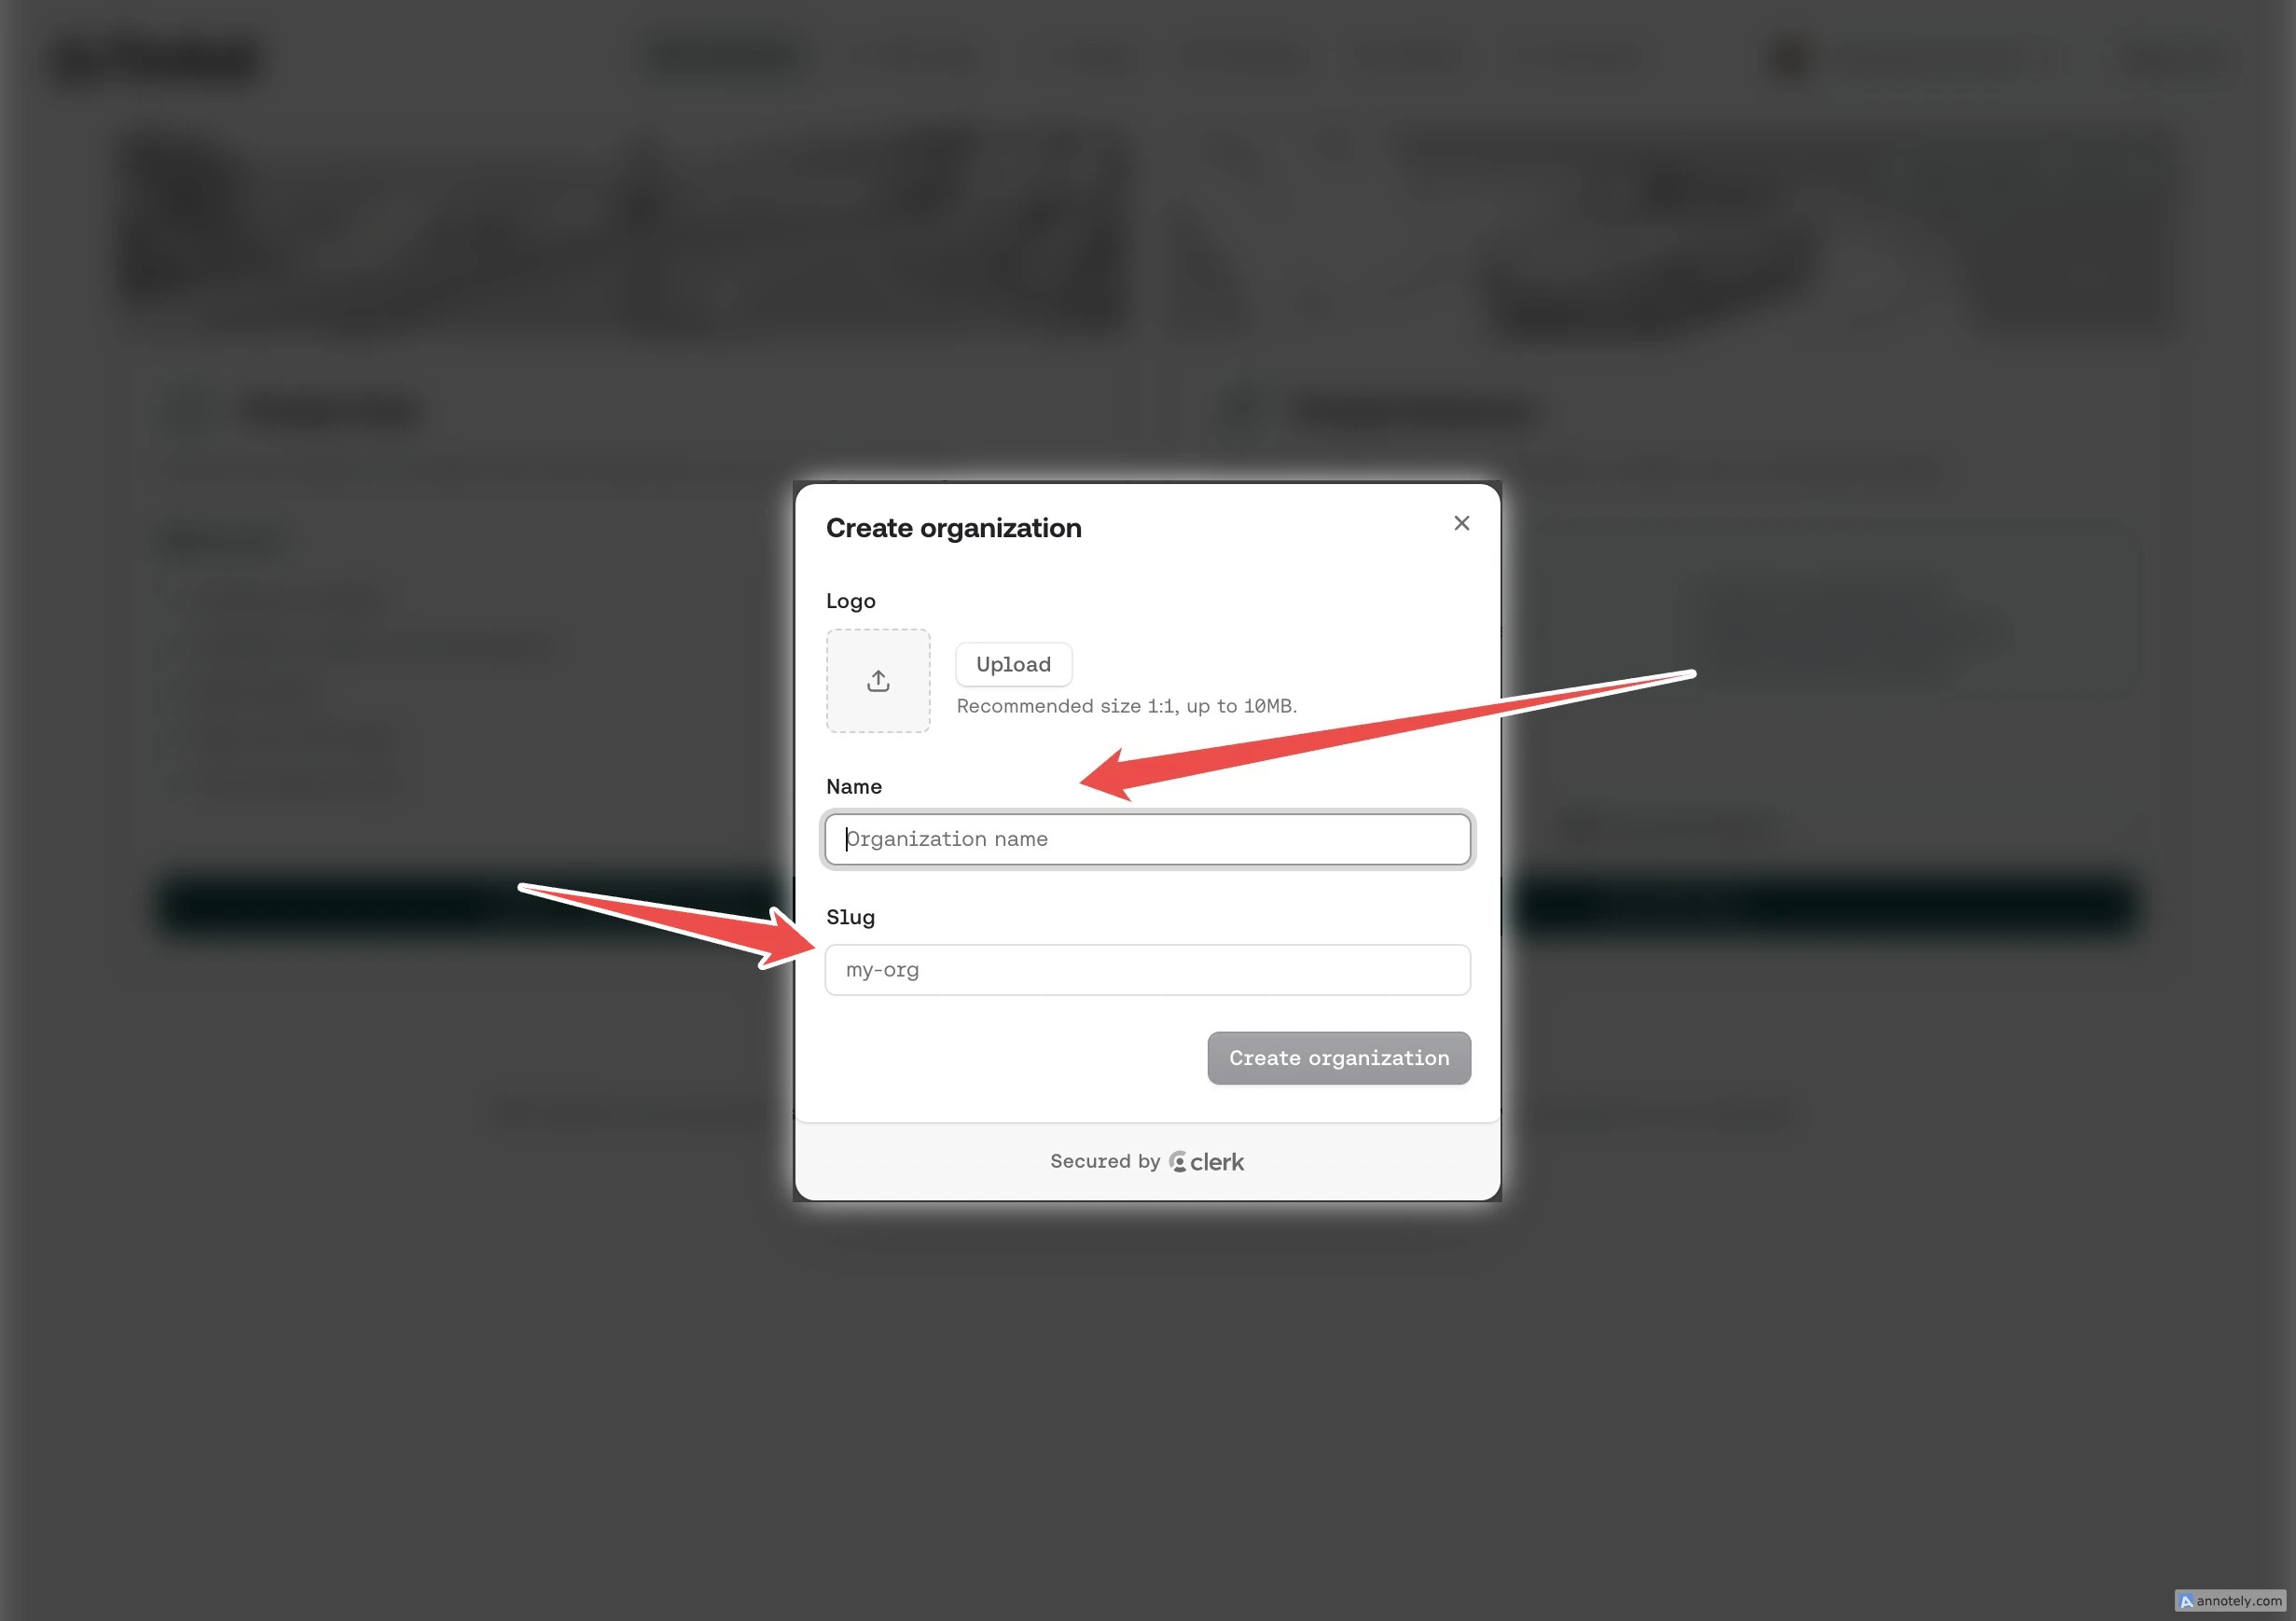
Step 3: Name Your Organization
Enter your organization Name and Slug. You can also upload a logo. The slug appears in your dashboard URL and API requests, so keep it short and memorable (e.g., acme, initech, wayne-labs). Click “Create organization” when ready.
The slug is unique to your organization, public-facing, and cannot be changed after creation. It should represent your organization (e.g., your company name or an abbreviation of it). Choose carefully.
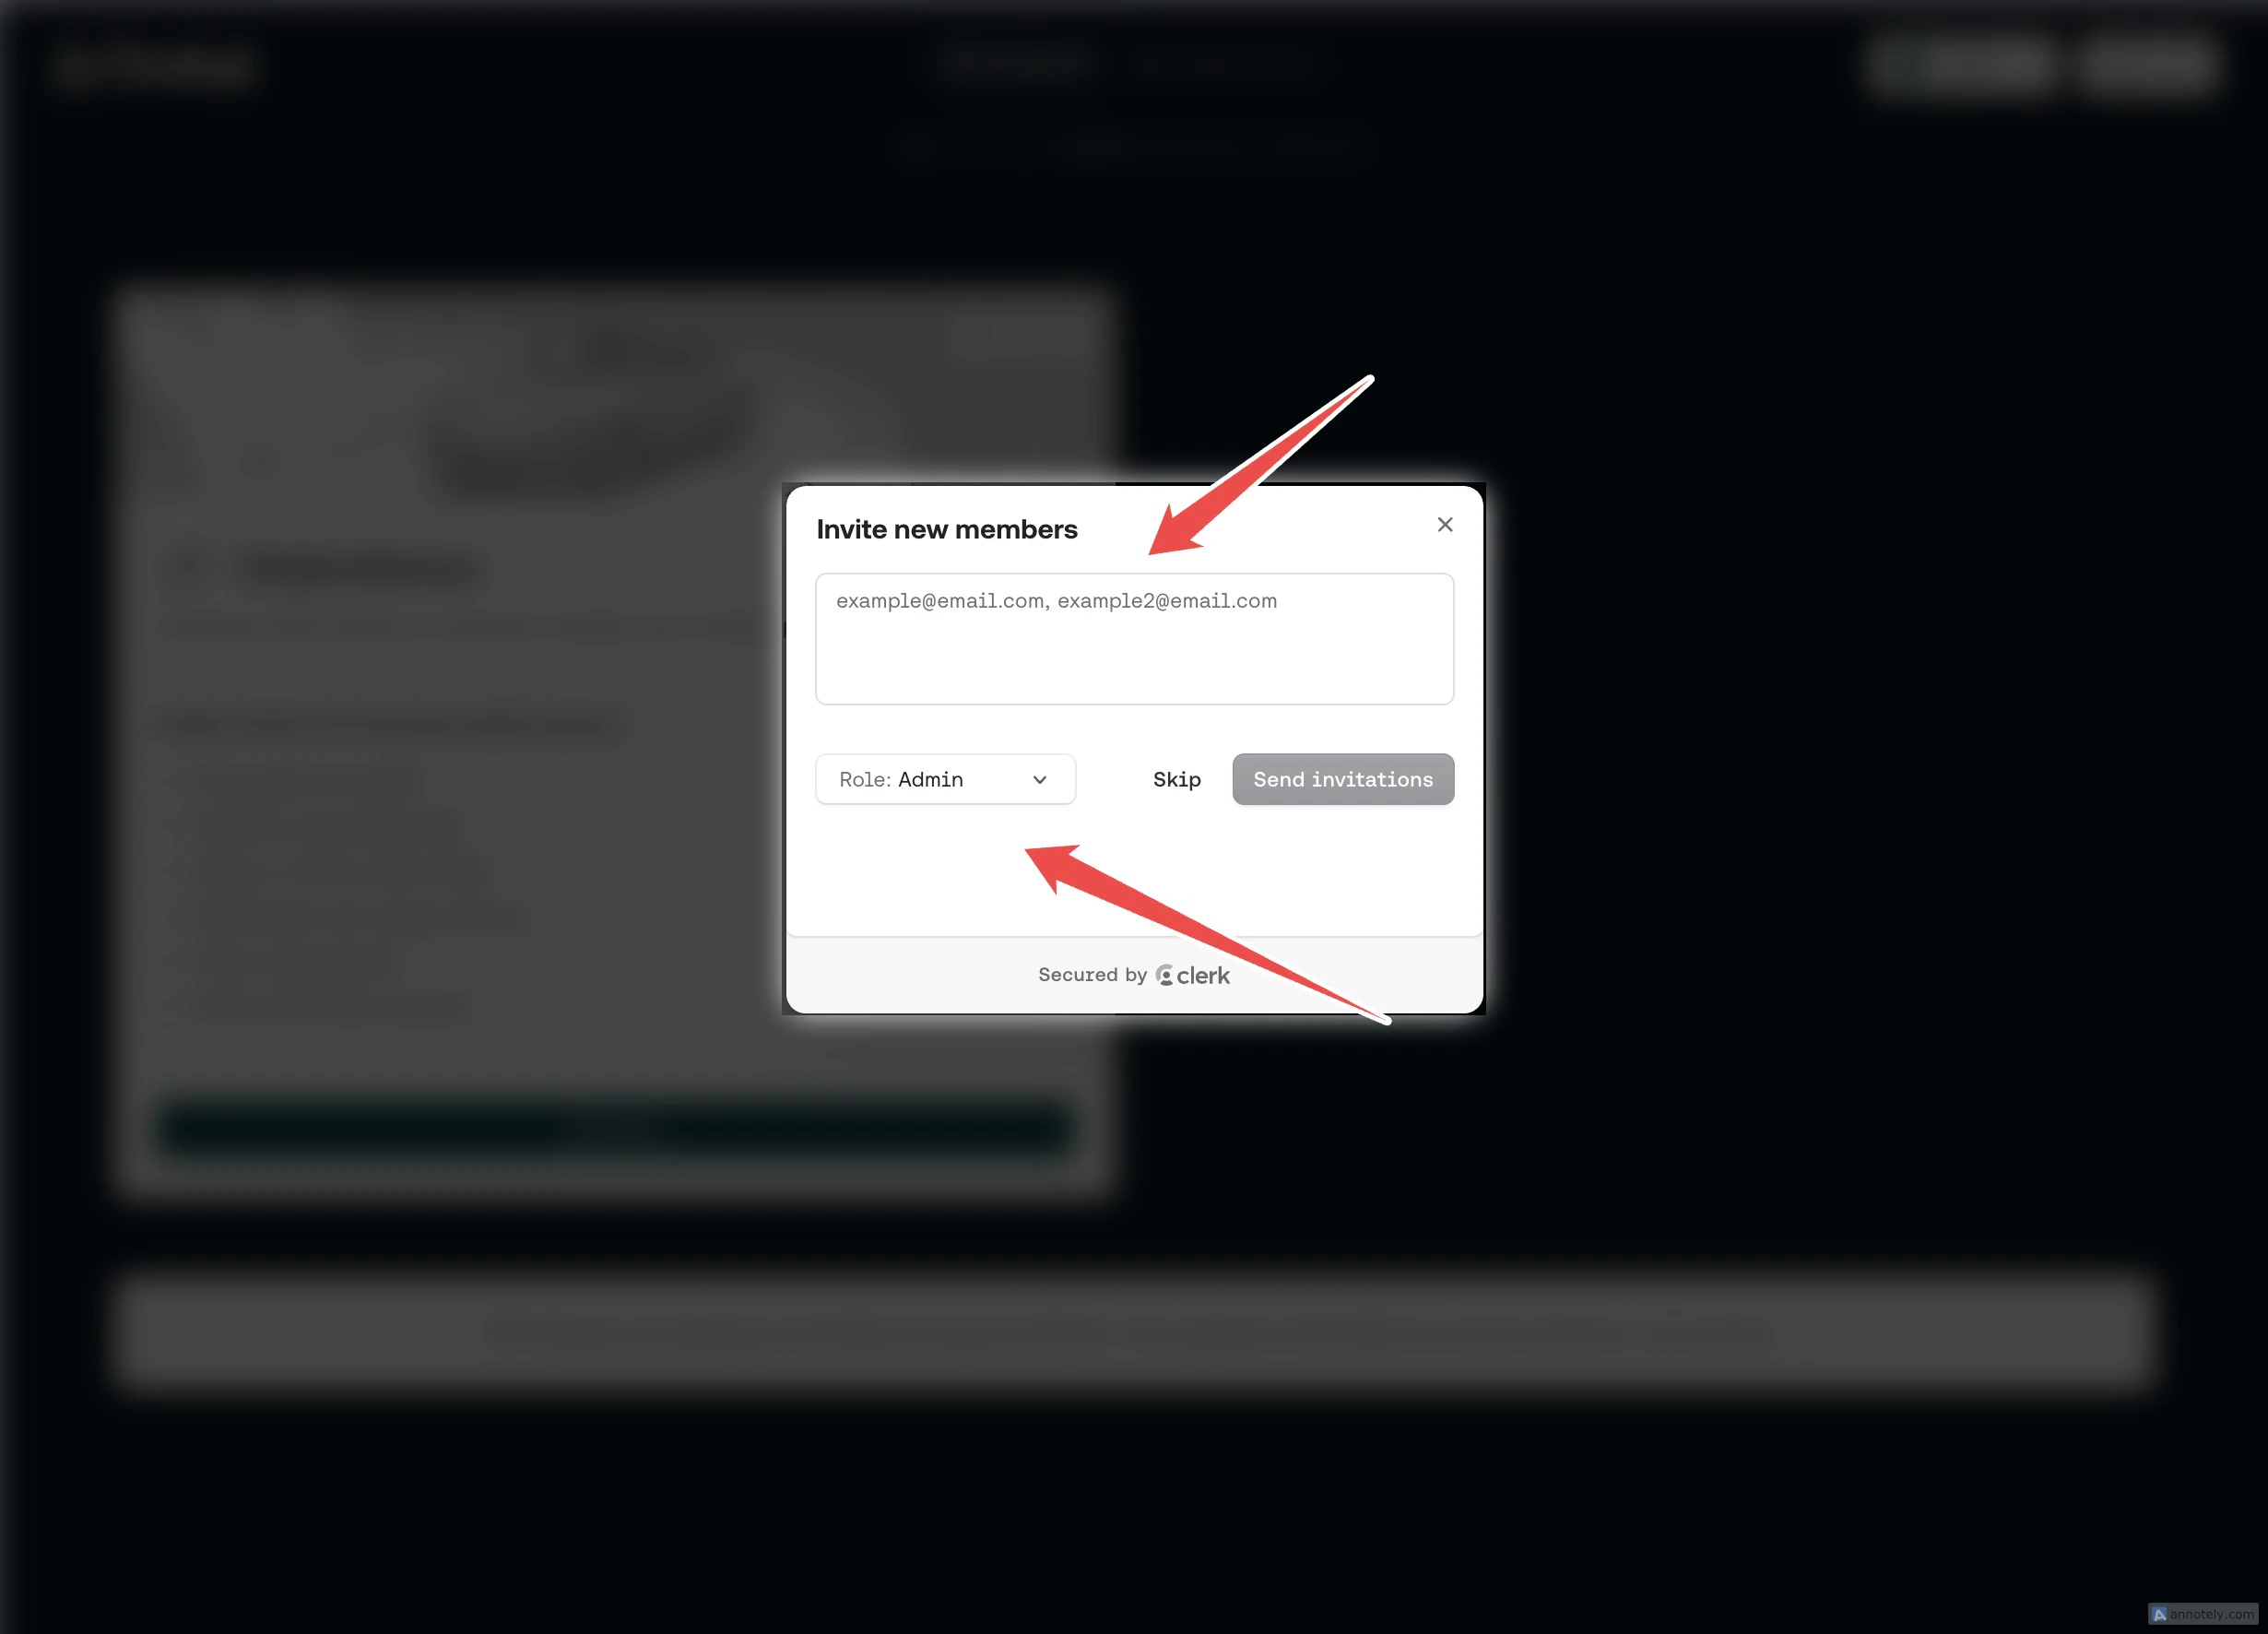
Step 4: Invite Members
Enter the email addresses of team members you want to invite, separated by commas. Select a Role for the invitees and click “Send invitations”. You can also click “Skip” to do this later.
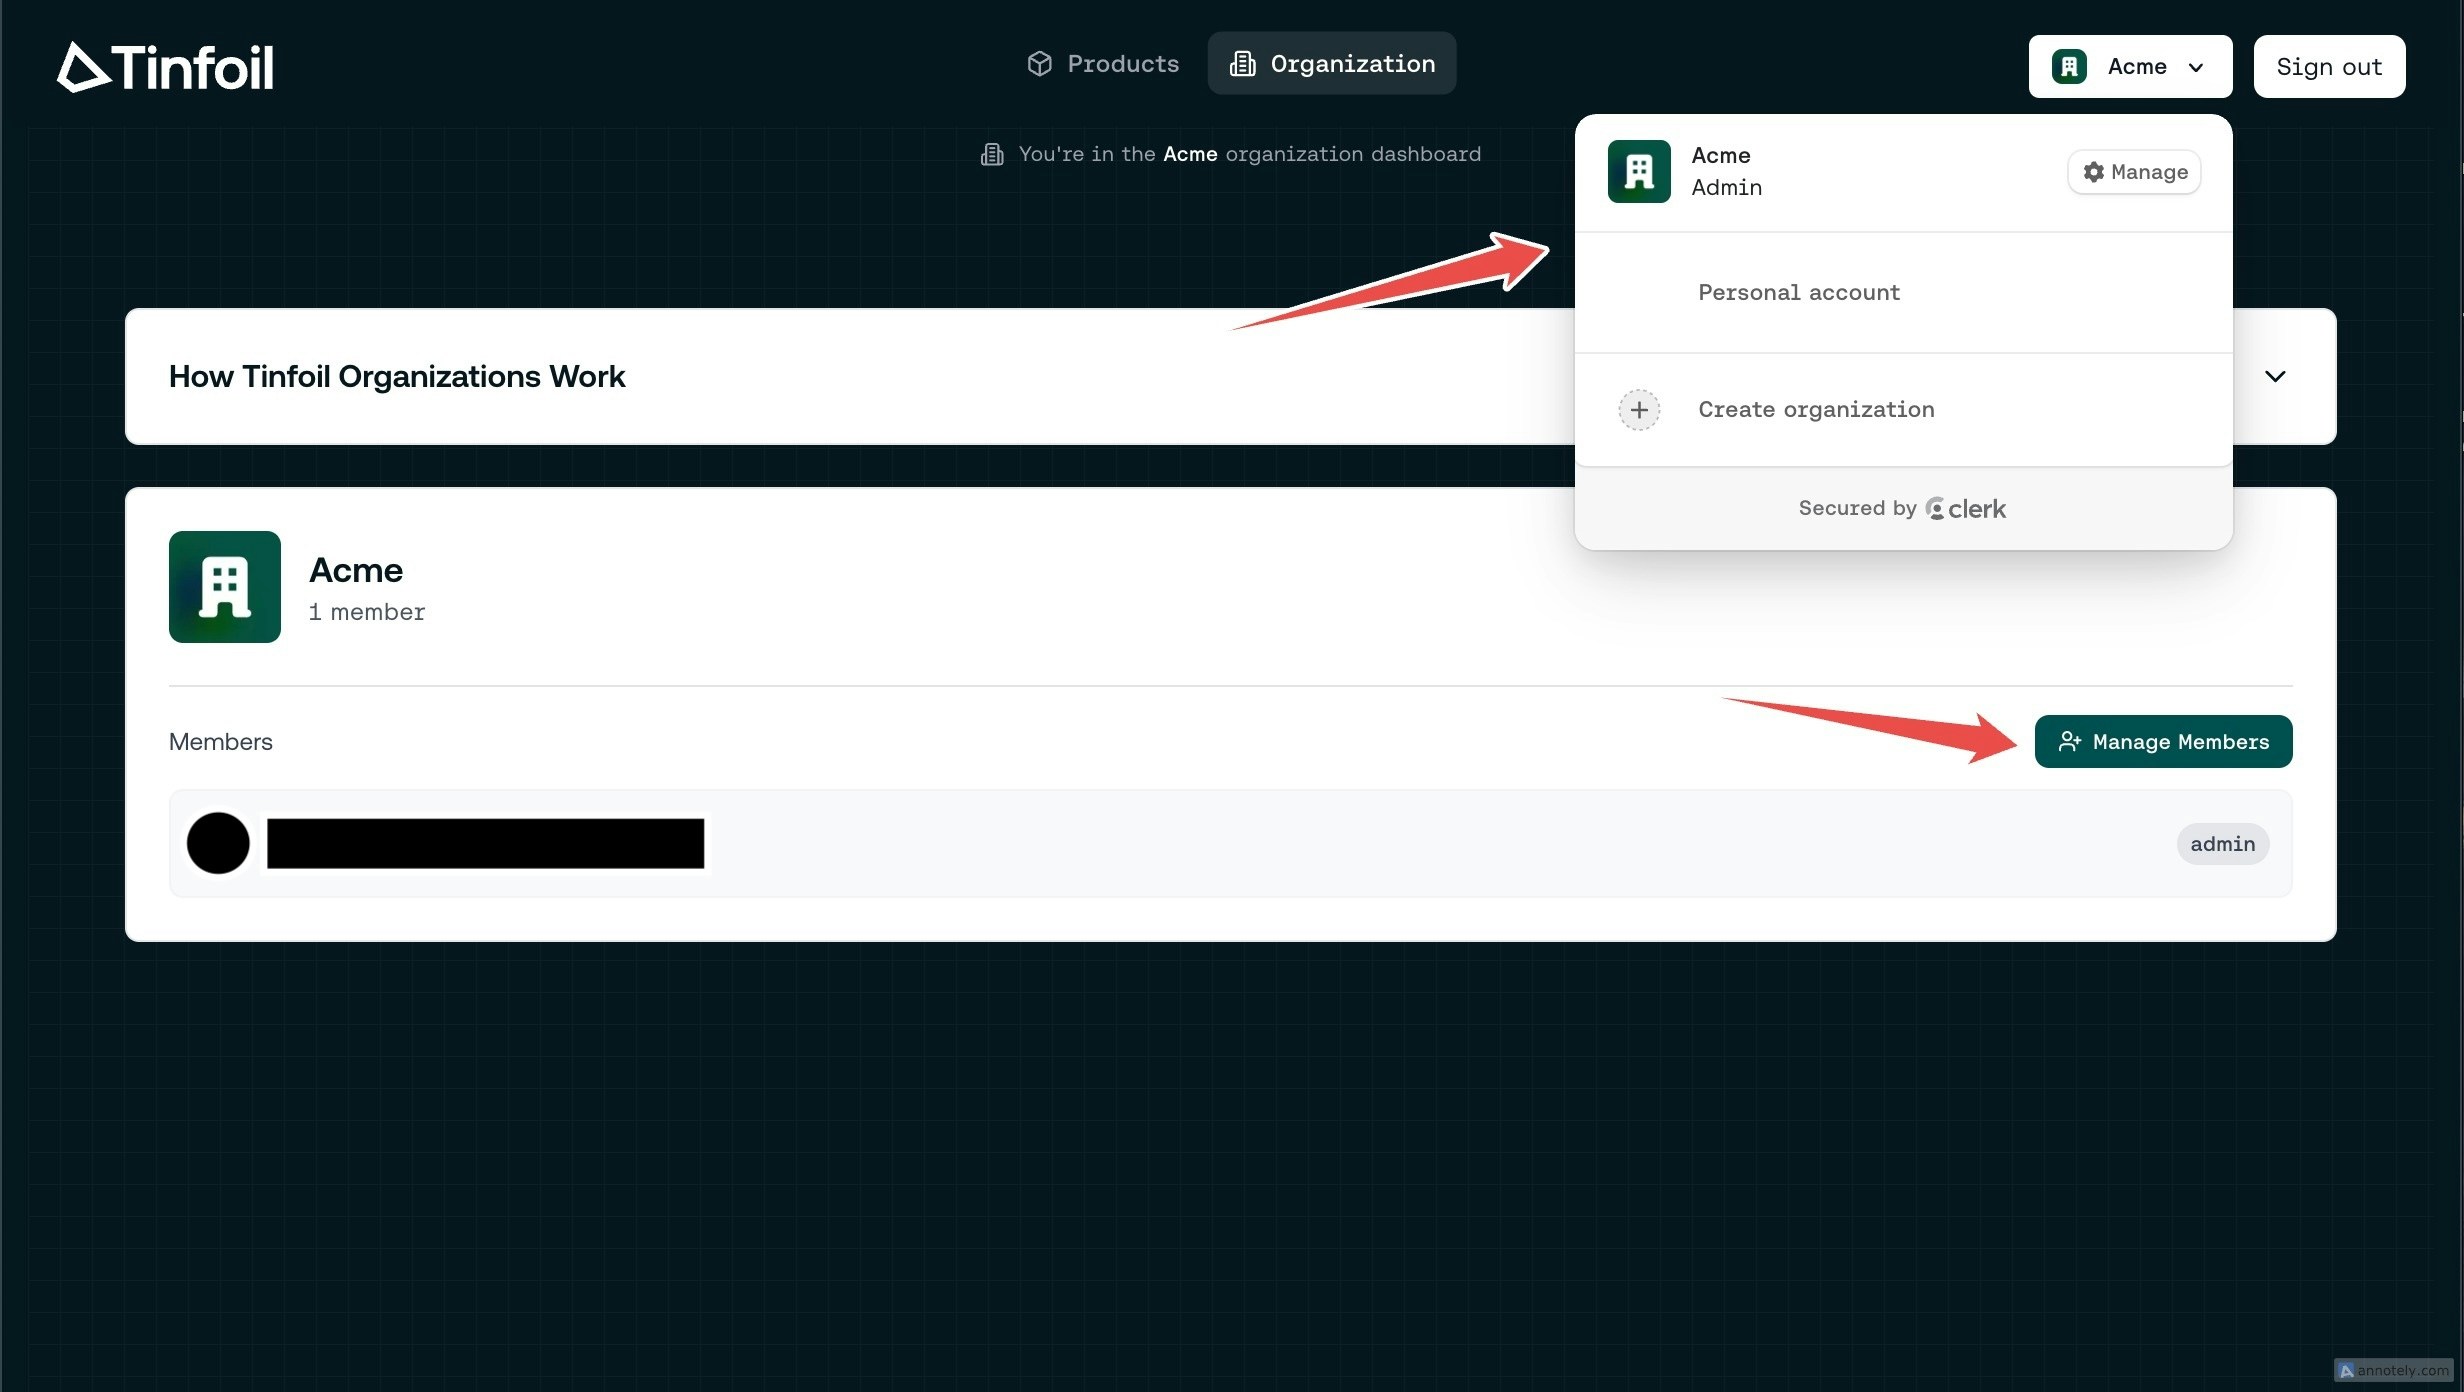
Step 5: Manage Your Organization
You’re now in the organization dashboard. Use the account switcher to switch between your personal account and your organizations. Click “Manage Members” to add or remove team members at any time.