> ## Documentation Index
> Fetch the complete documentation index at: https://docs.tinfoil.sh/llms.txt
> Use this file to discover all available pages before exploring further.
# Creating an organization
> Step-by-step guide for creating and managing a Tinfoil organization
Organizations let your team share API keys, billing, and usage under a single account.
## Step 1: Open the Account Switcher
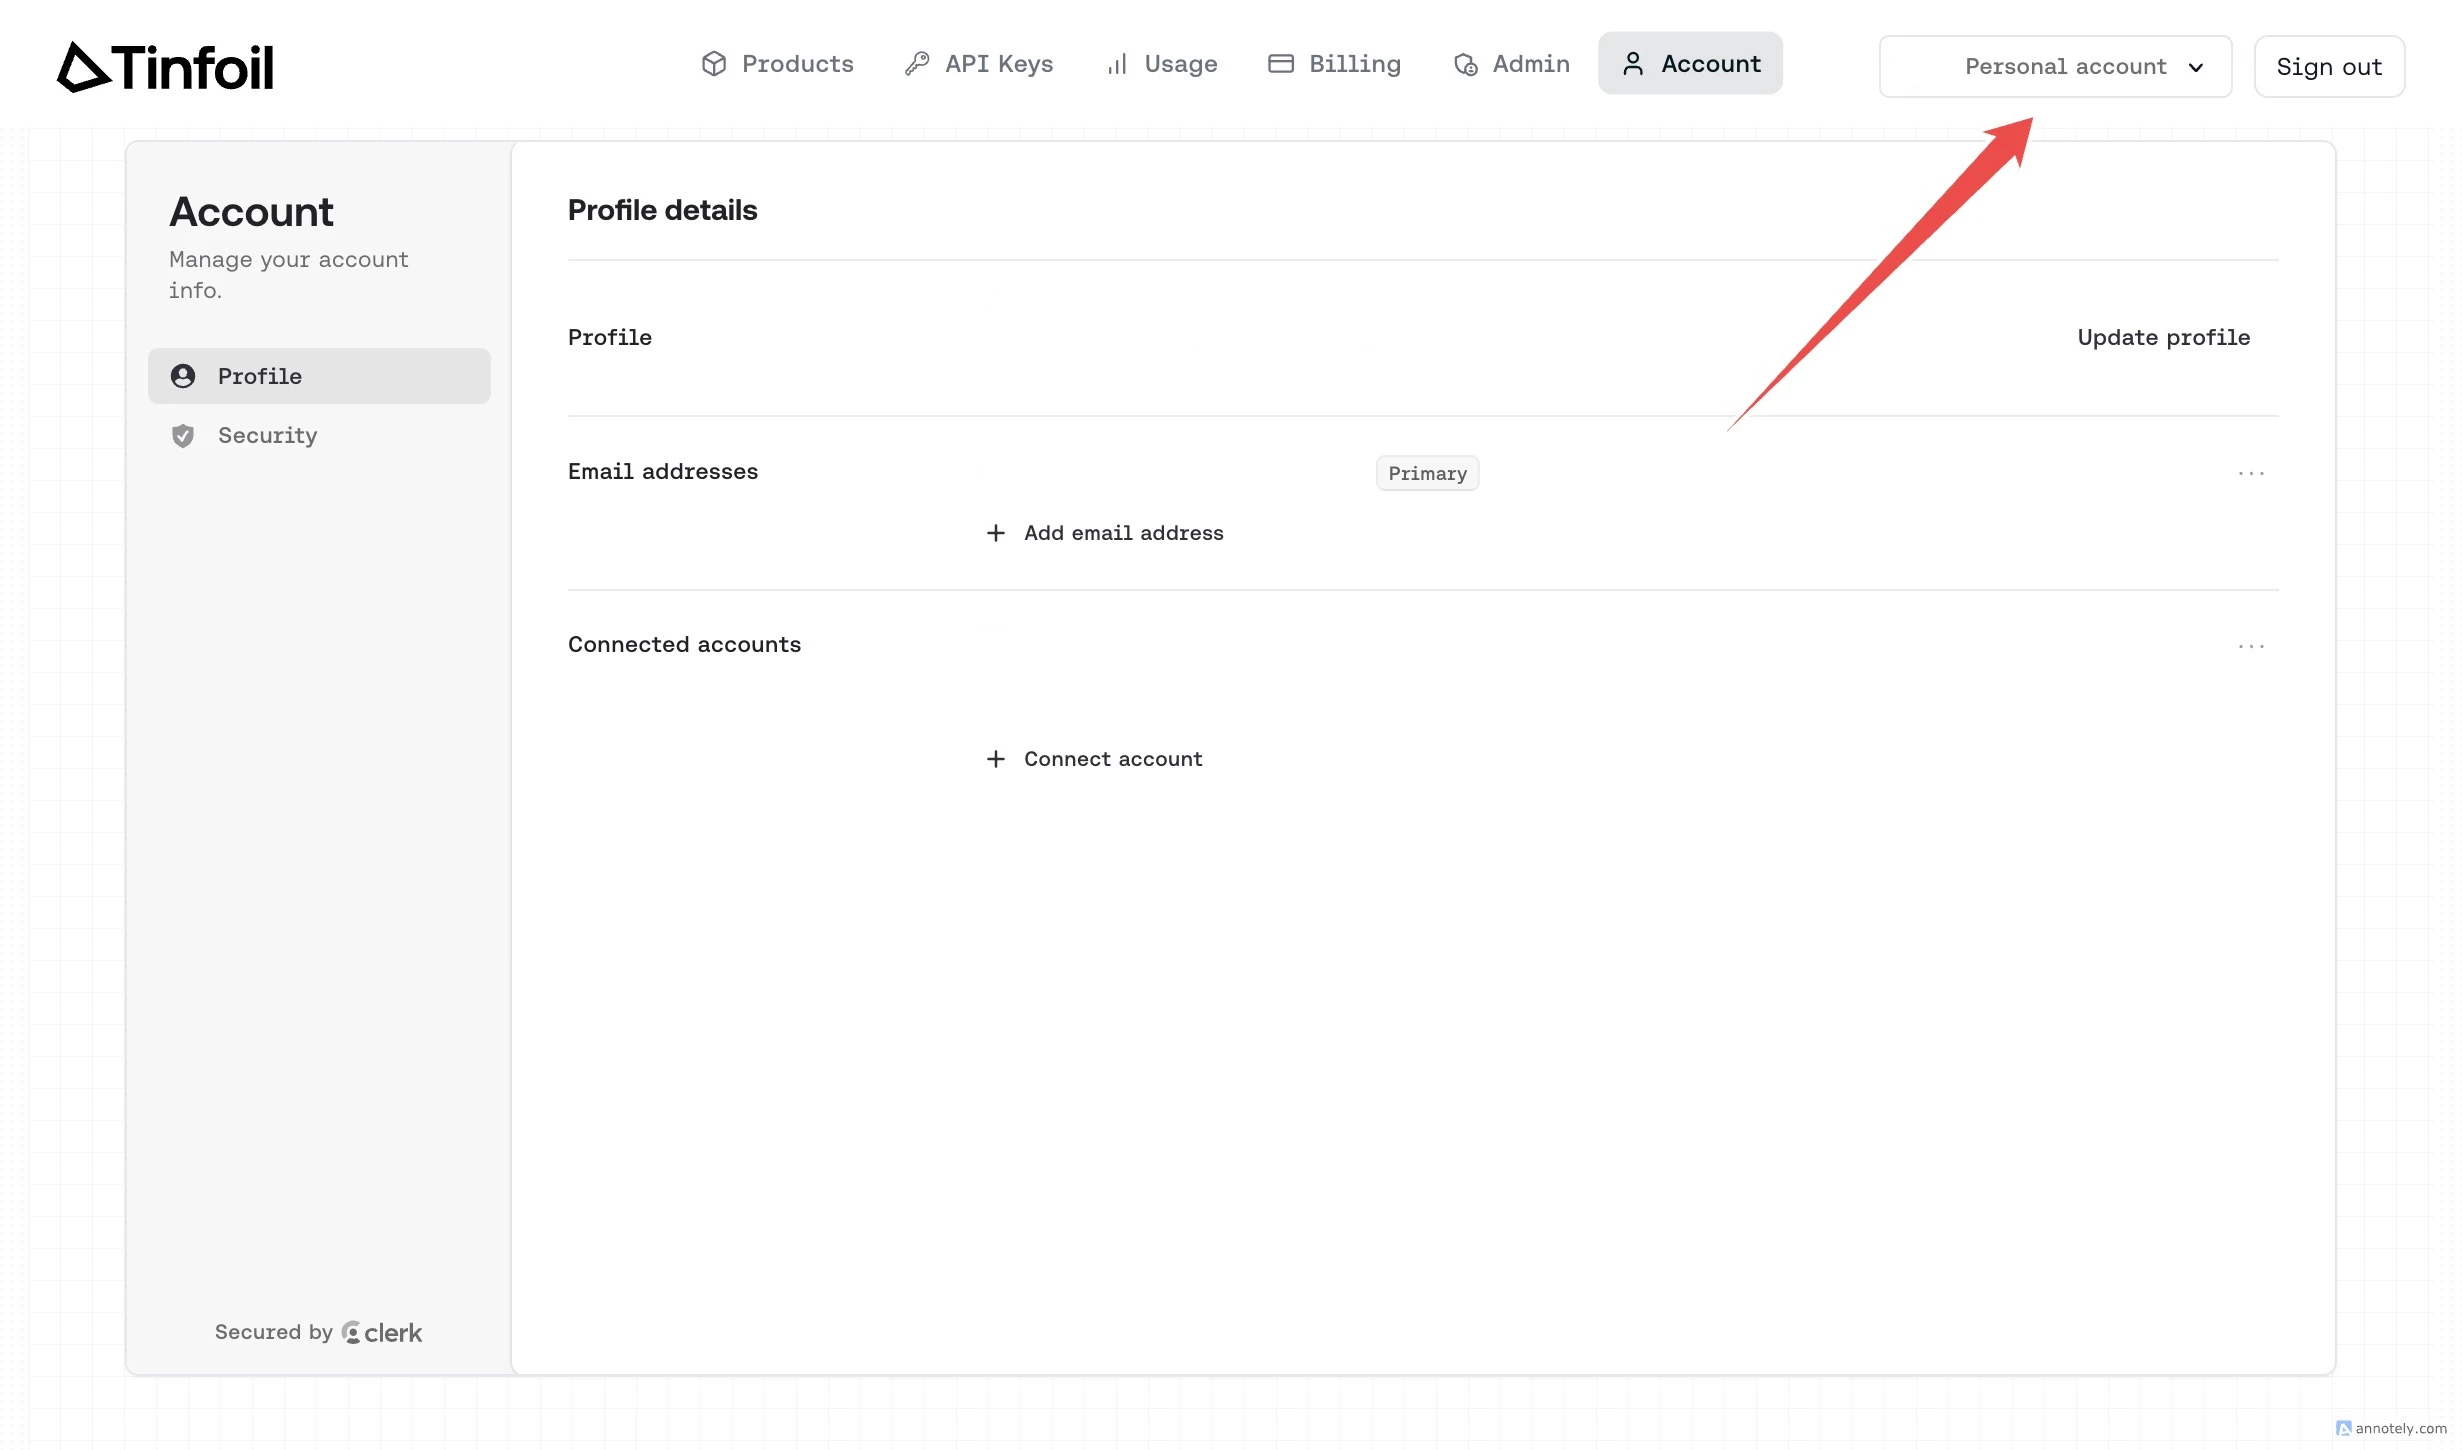
From the dashboard, click the **"Personal account"** dropdown in the top right corner.
 ## Step 2: Create Organization
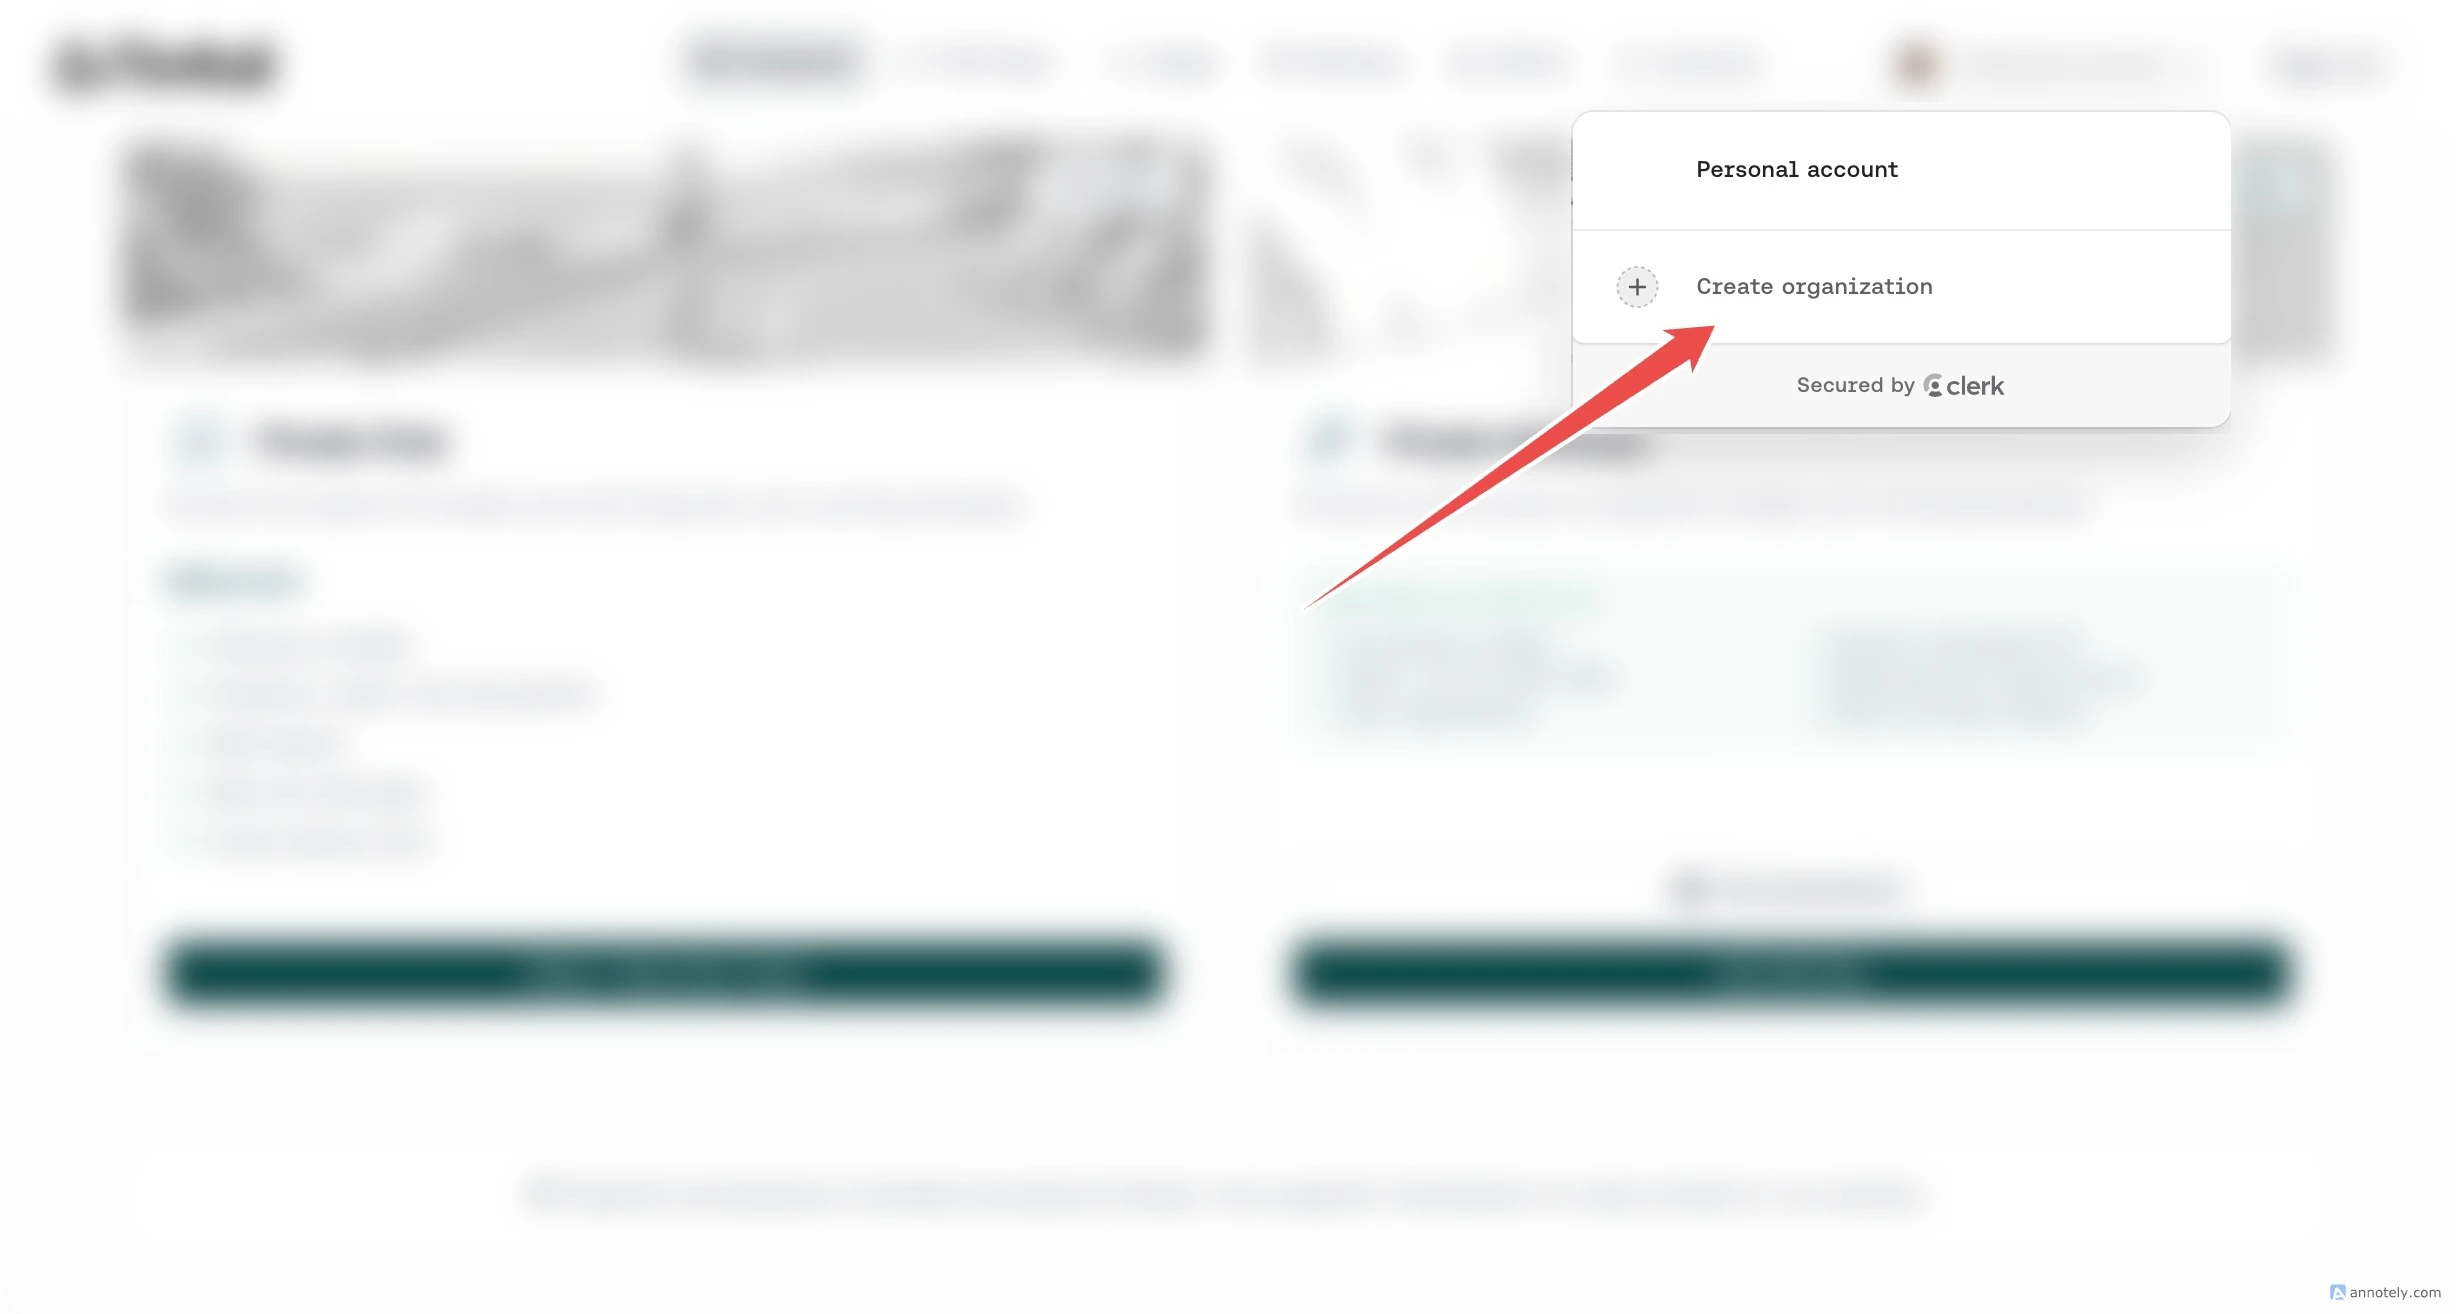
In the dropdown menu, click **"Create organization"**.
## Step 2: Create Organization
In the dropdown menu, click **"Create organization"**.
 ## Step 3: Name Your Organization
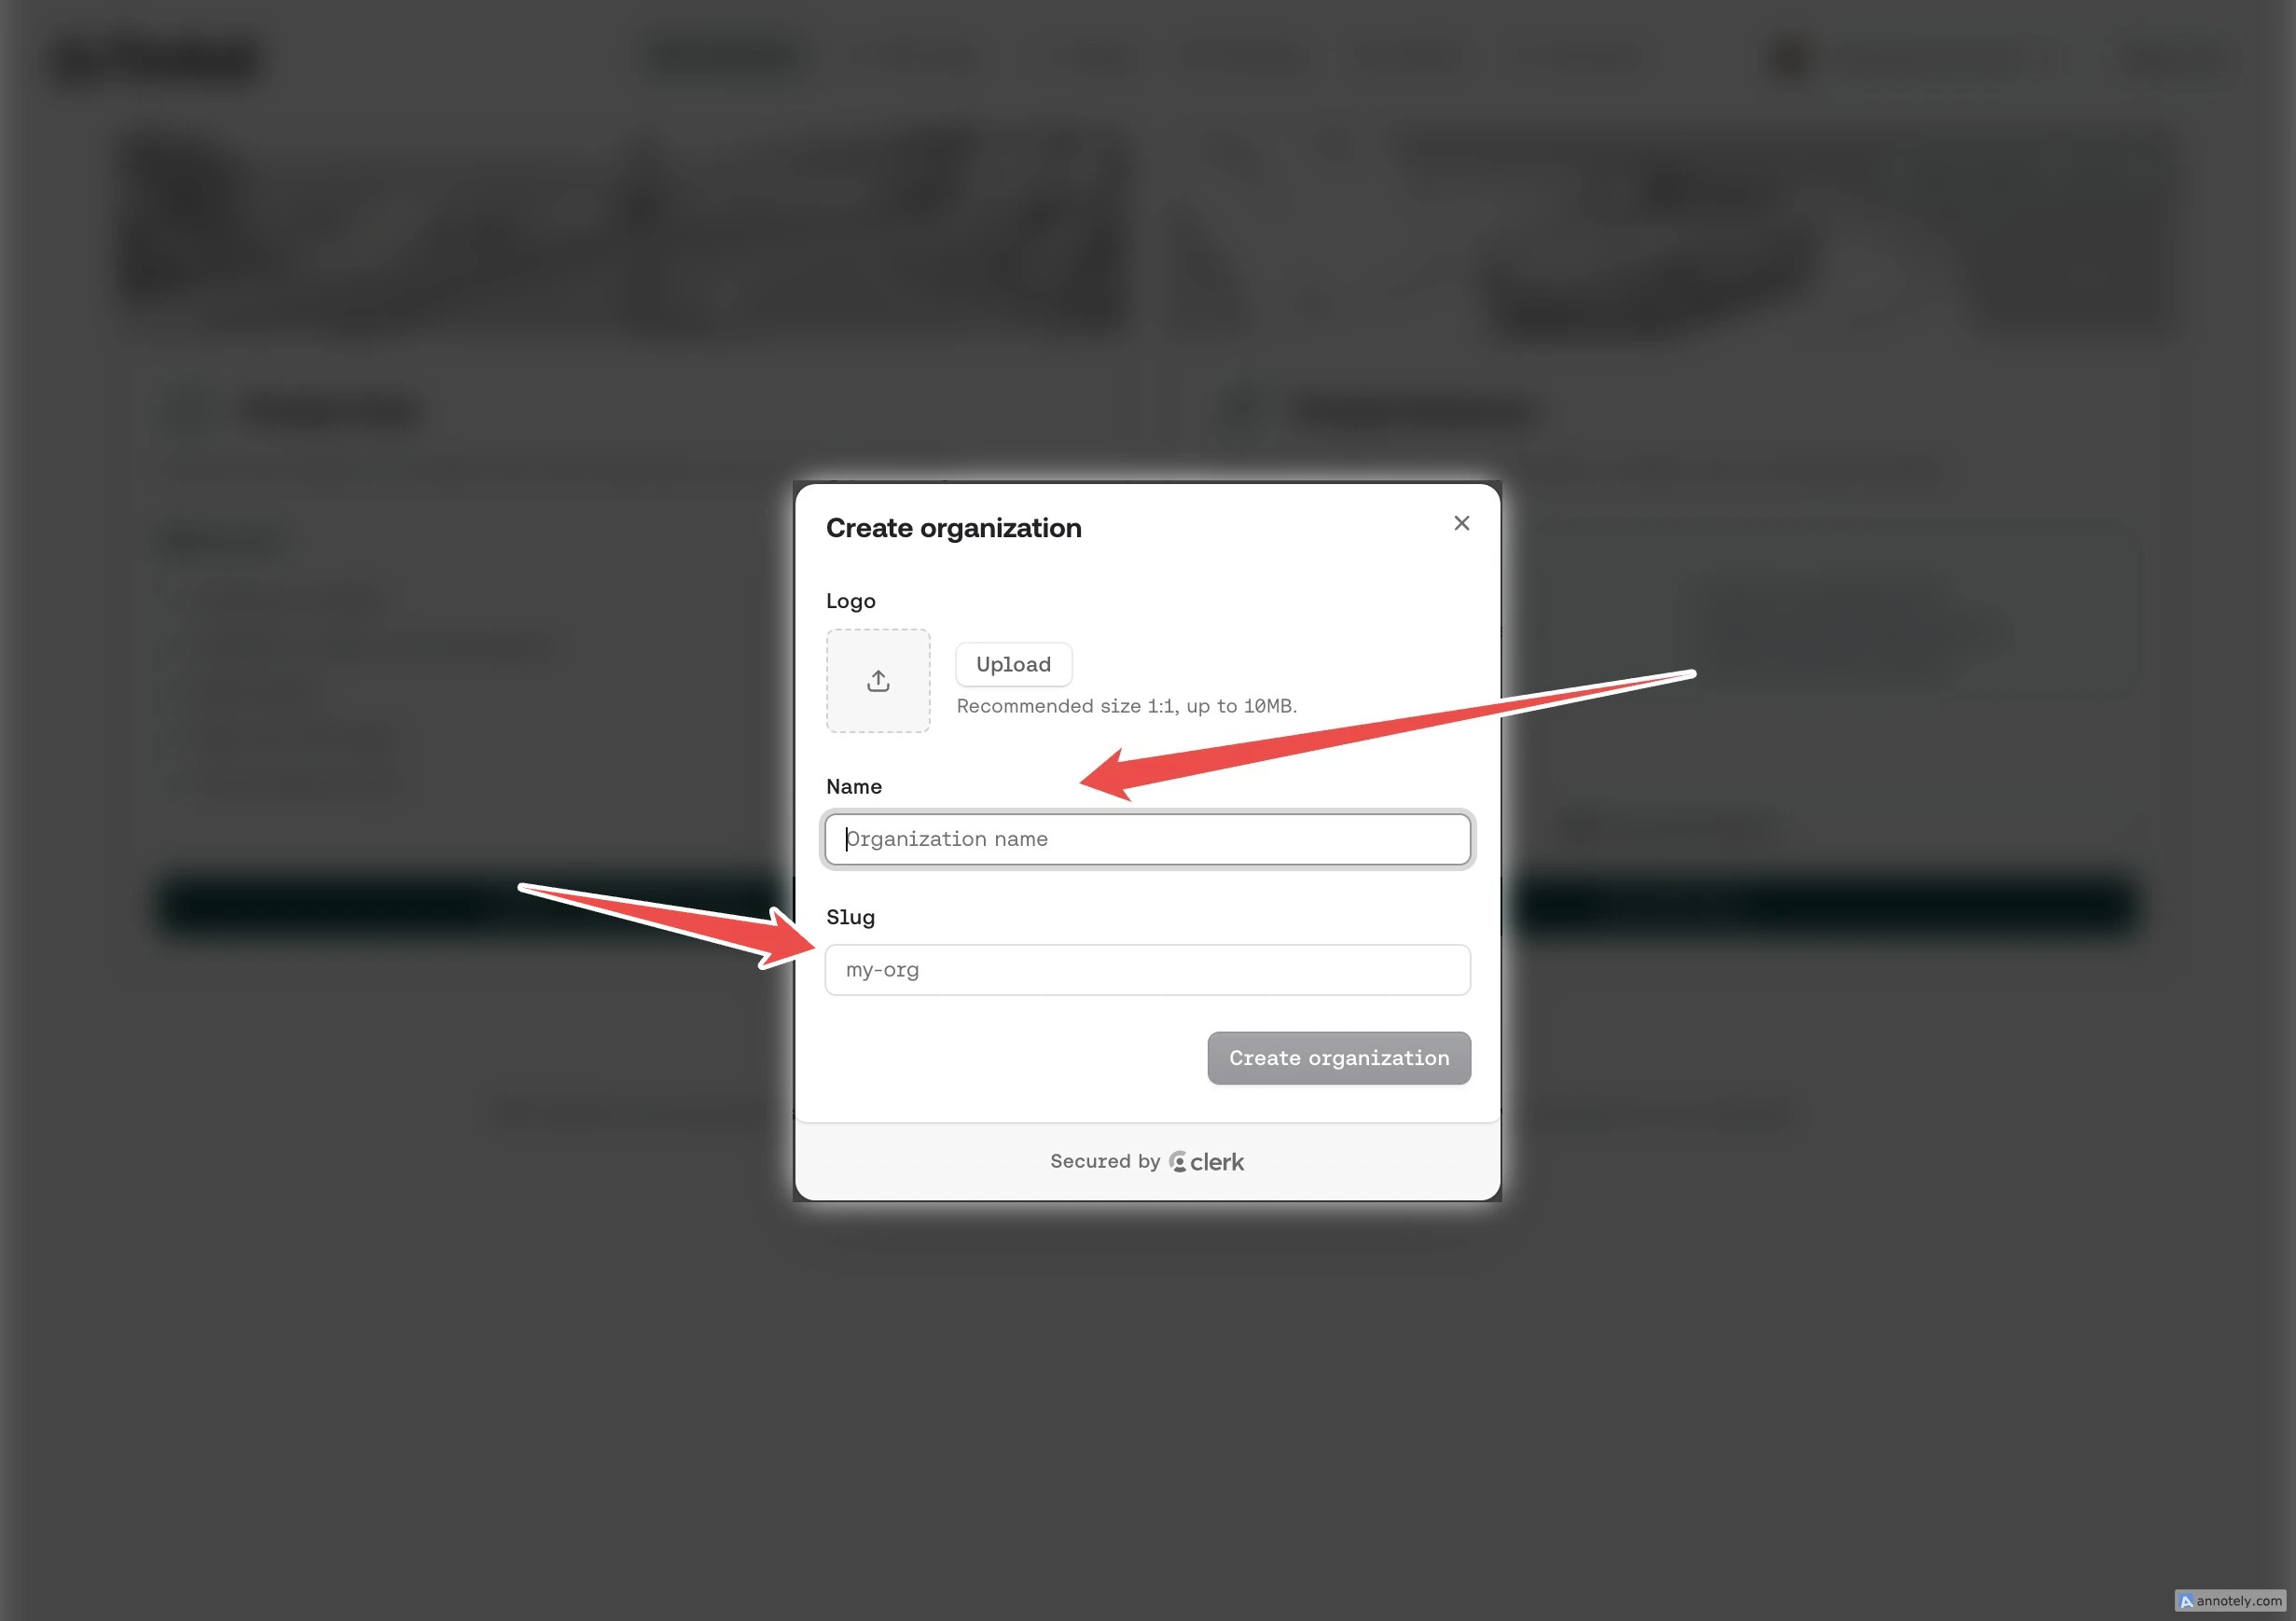
Enter your organization **Name** and **Slug**. You can also upload a logo. The slug appears in your dashboard URL and API requests, so keep it short and memorable (e.g., `acme`, `initech`, `wayne-labs`). Click **"Create organization"** when ready.
The slug is unique to your organization, public-facing, and cannot be changed after creation. It should represent your organization (e.g., your company name or an abbreviation of it). Choose carefully.
## Step 3: Name Your Organization
Enter your organization **Name** and **Slug**. You can also upload a logo. The slug appears in your dashboard URL and API requests, so keep it short and memorable (e.g., `acme`, `initech`, `wayne-labs`). Click **"Create organization"** when ready.
The slug is unique to your organization, public-facing, and cannot be changed after creation. It should represent your organization (e.g., your company name or an abbreviation of it). Choose carefully.
 ## Step 4: Invite Members
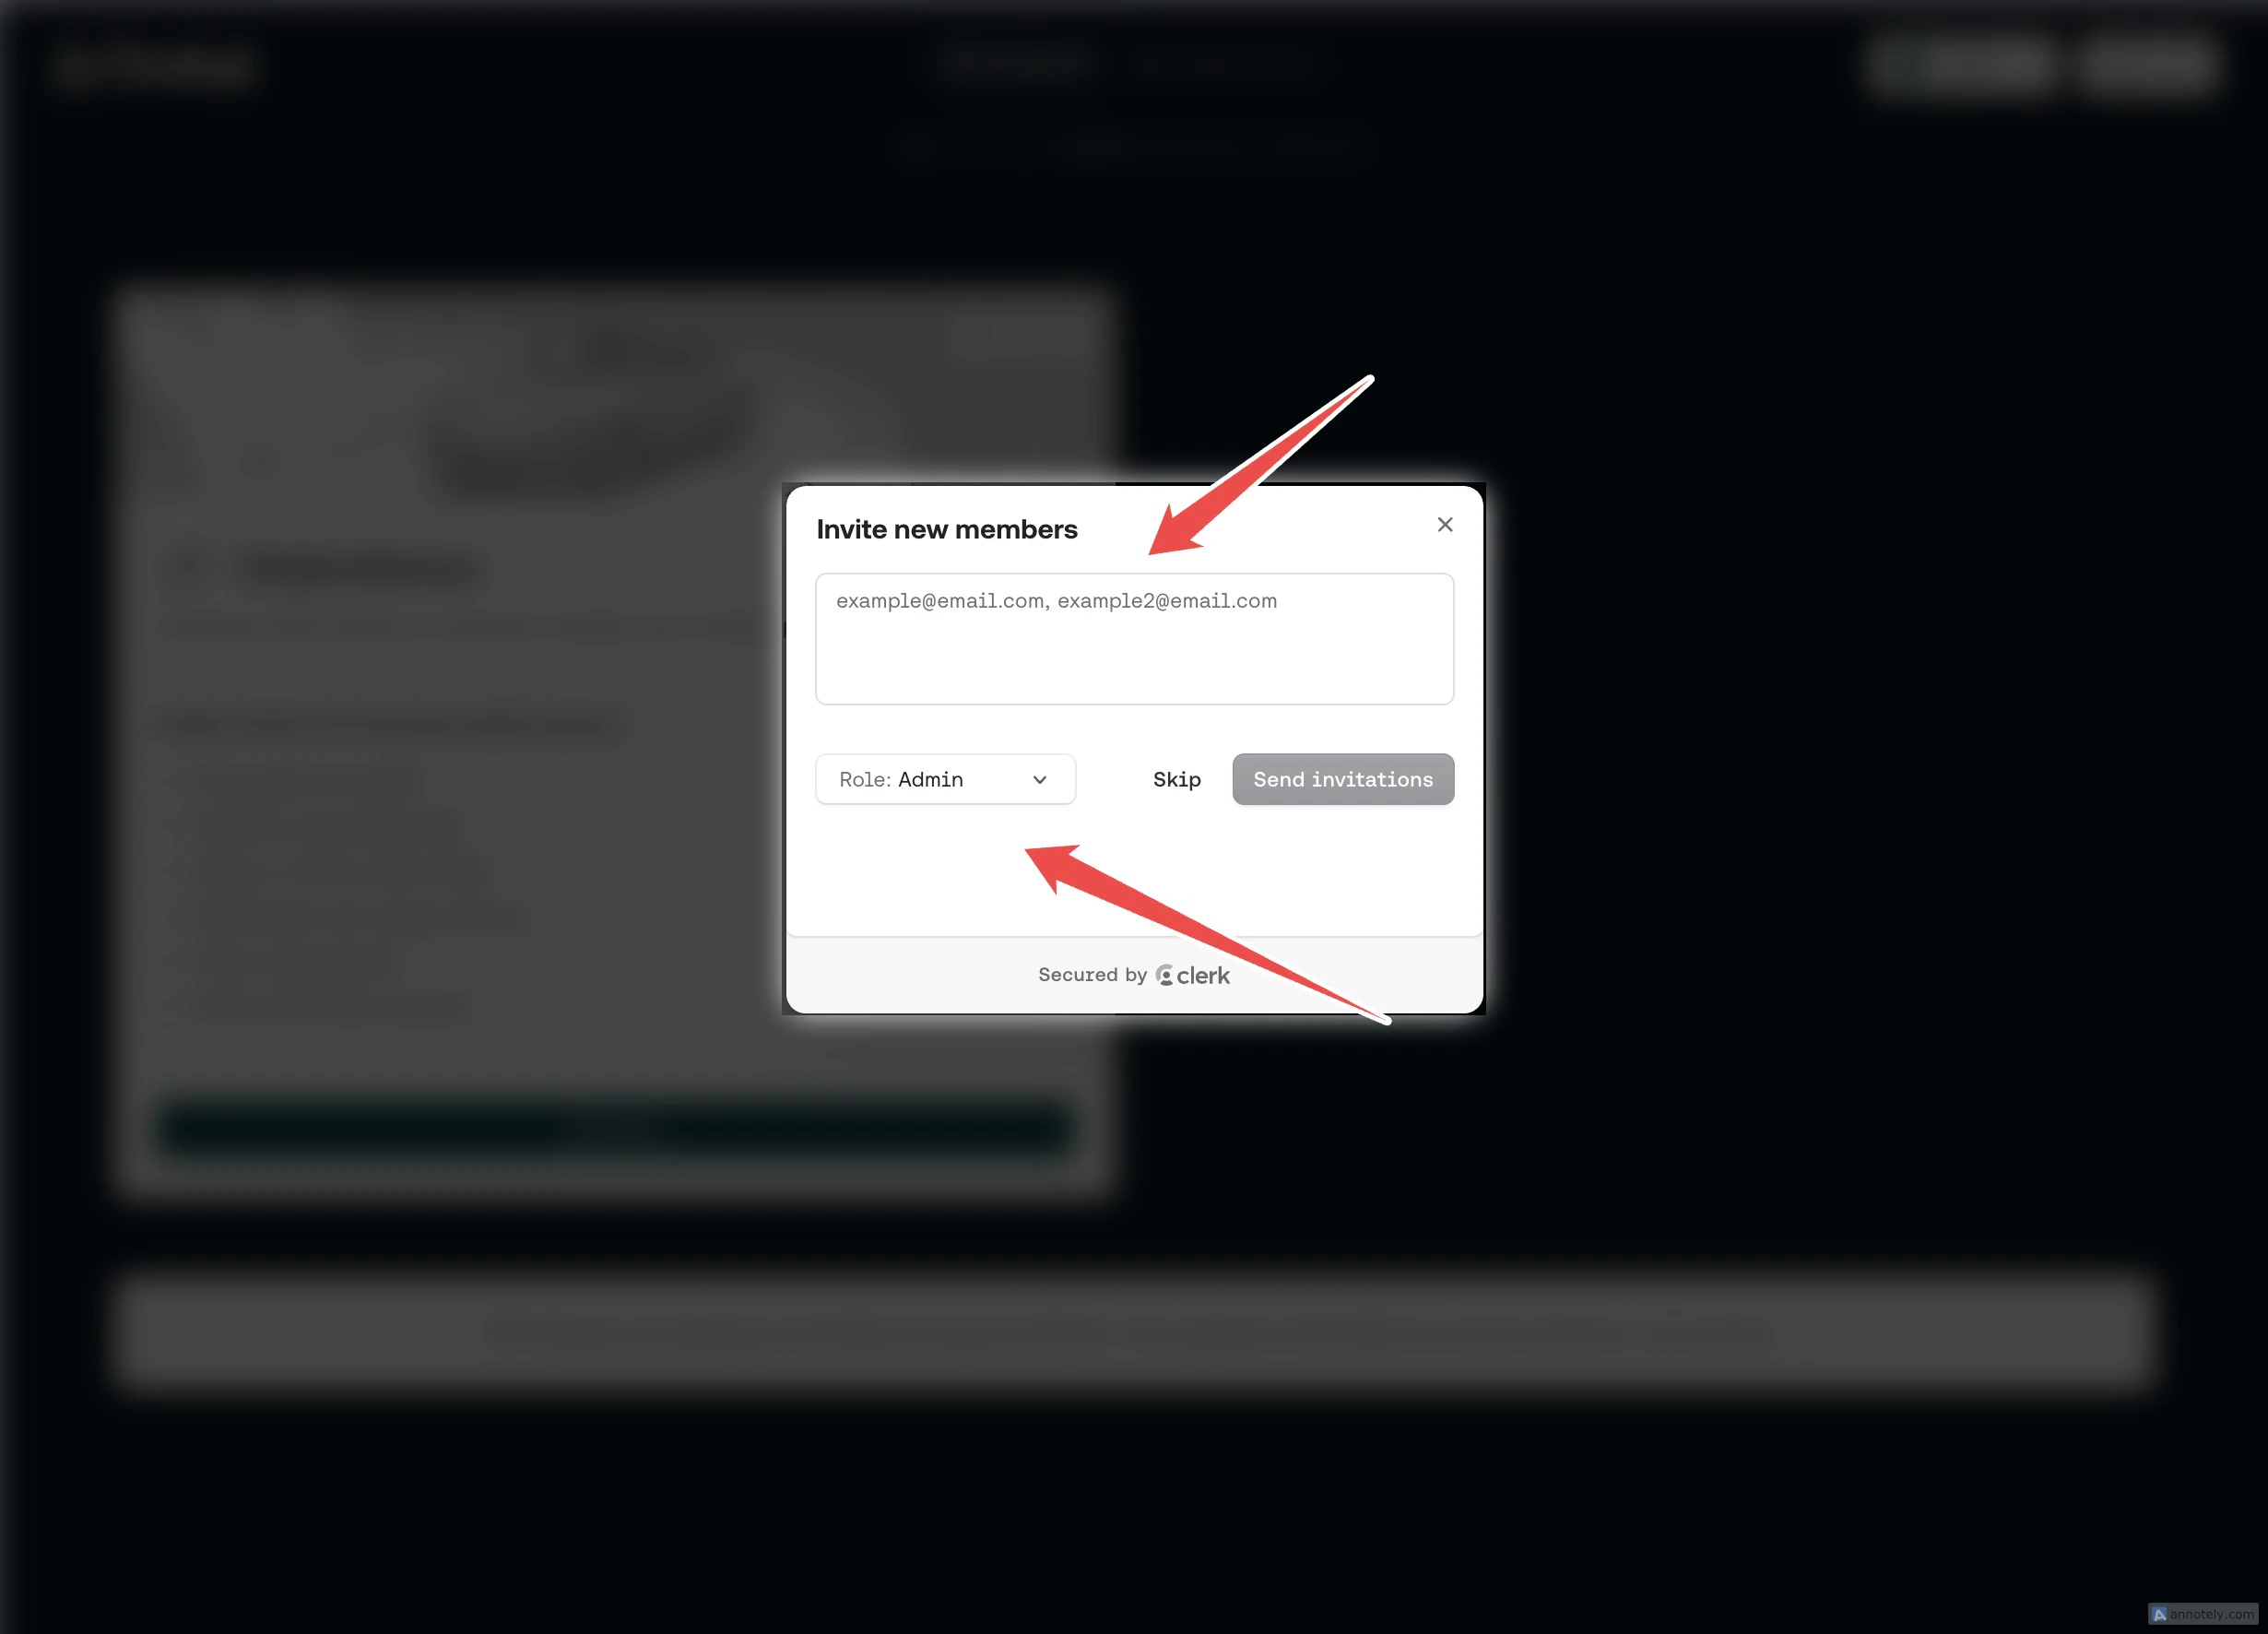
Enter the email addresses of team members you want to invite, separated by commas. Select a **Role** for the invitees and click **"Send invitations"**. You can also click **"Skip"** to do this later.
## Step 4: Invite Members
Enter the email addresses of team members you want to invite, separated by commas. Select a **Role** for the invitees and click **"Send invitations"**. You can also click **"Skip"** to do this later.
 ## Step 5: Manage Your Organization
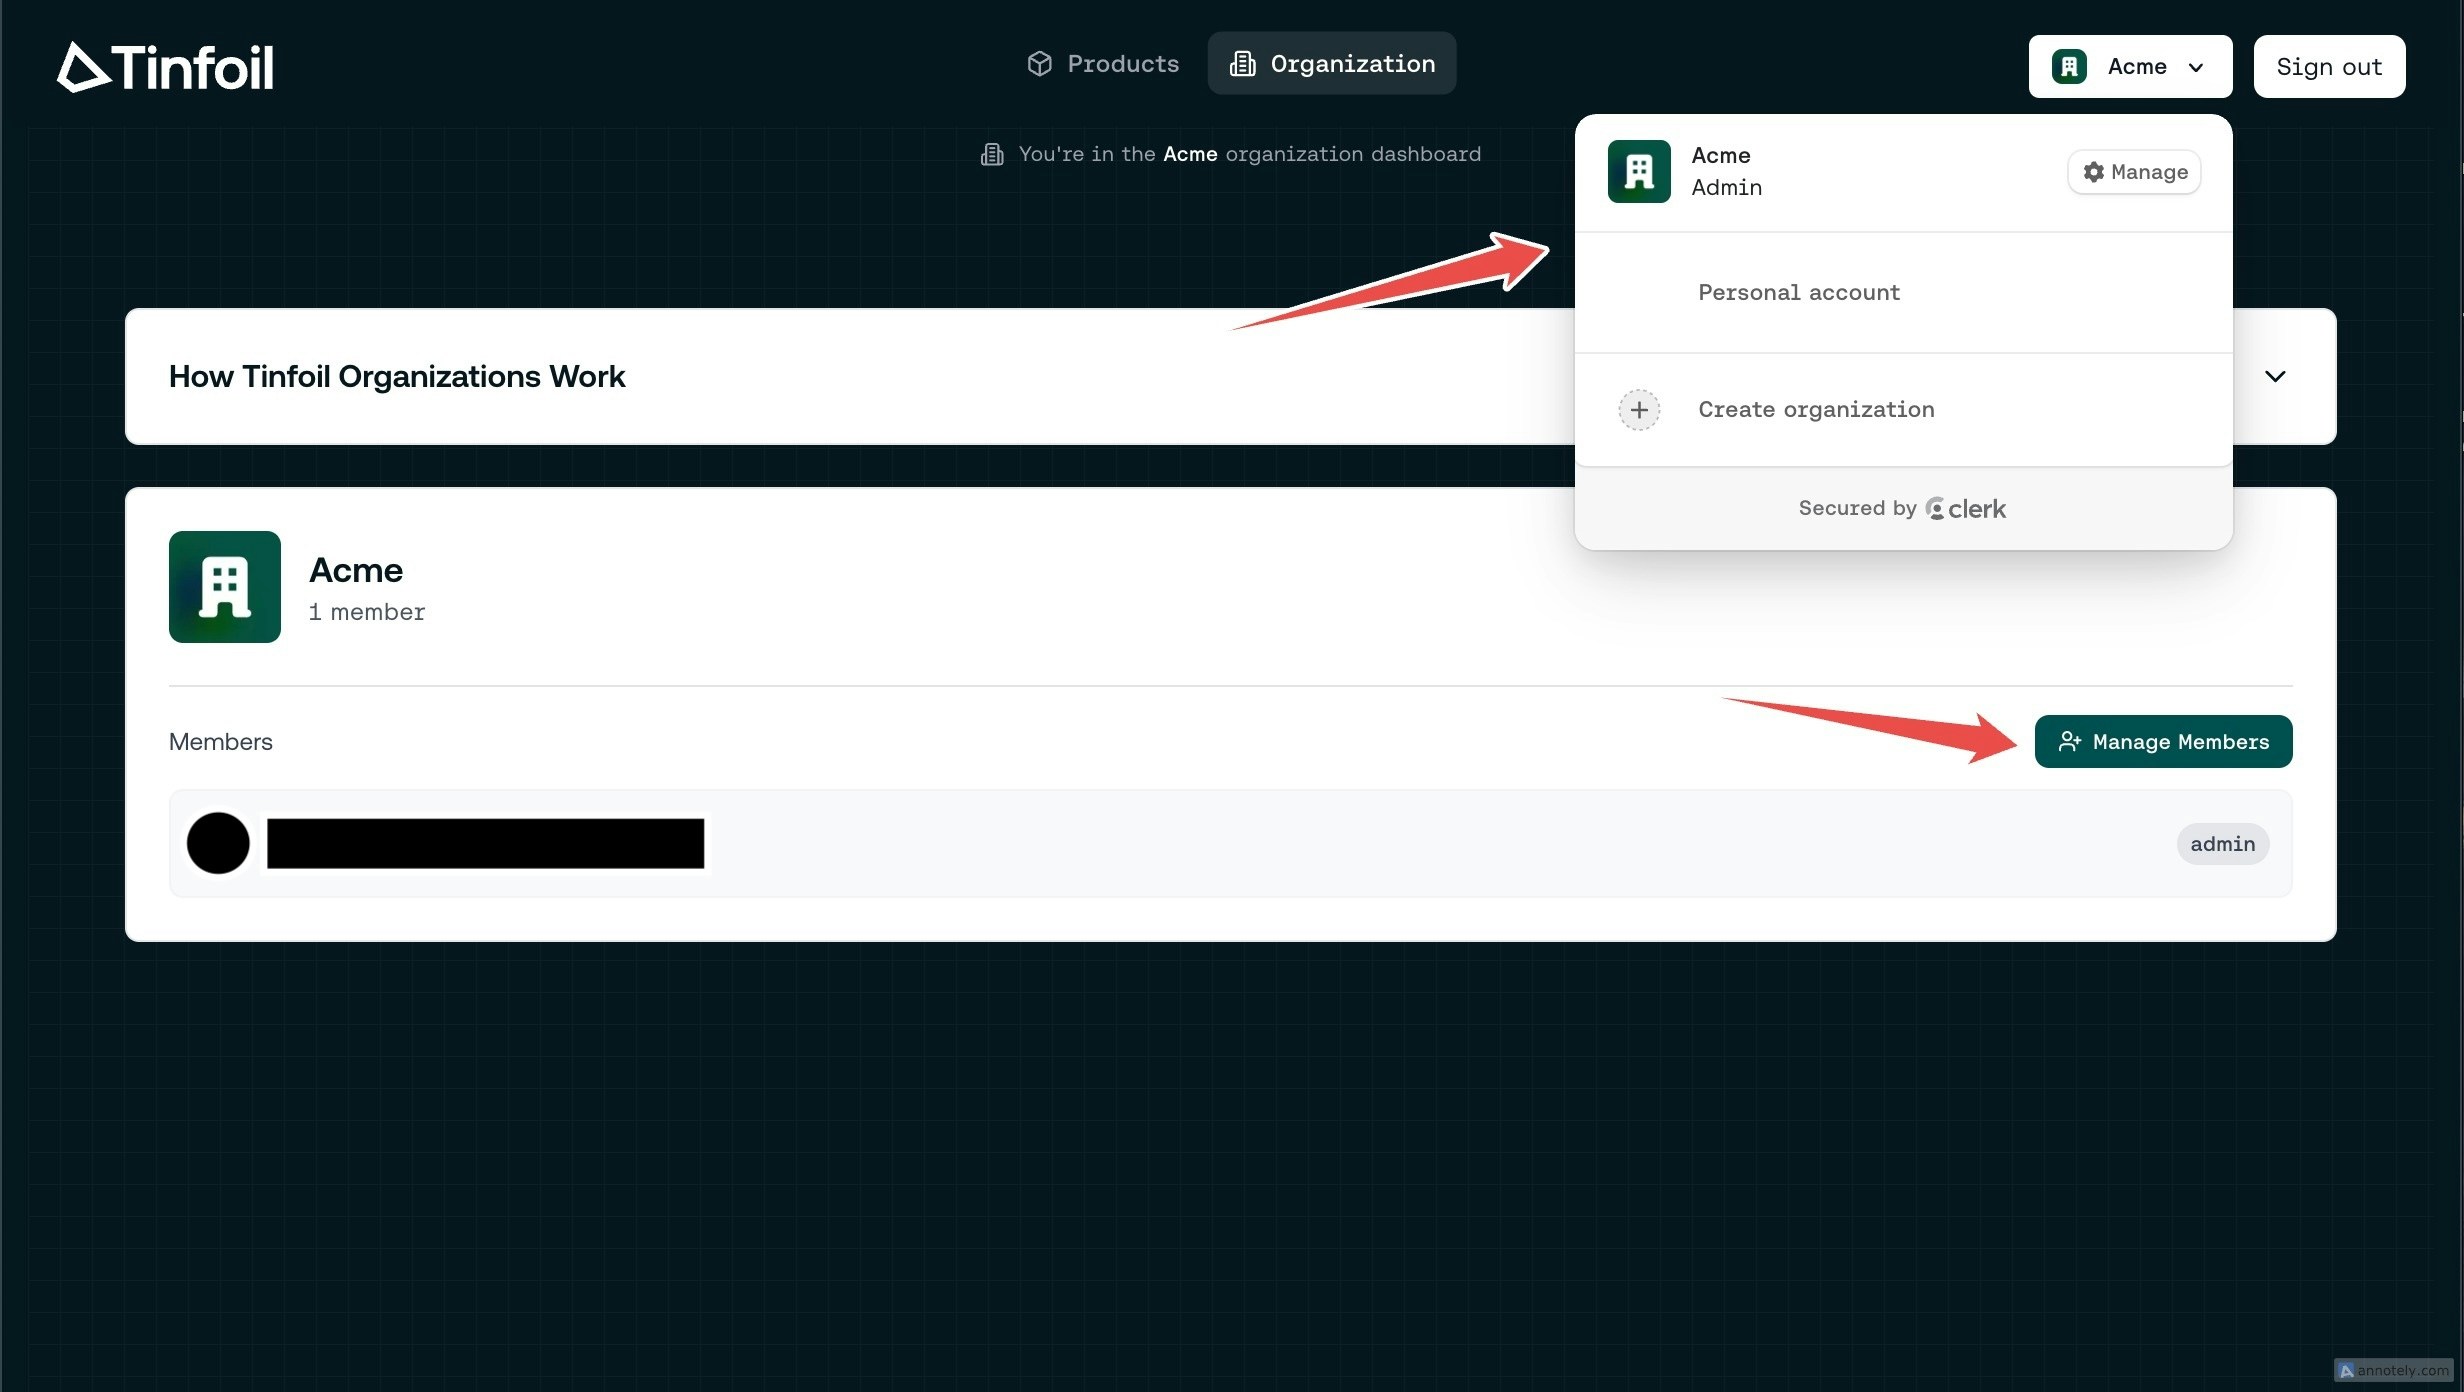
You're now in the organization dashboard. Use the account switcher to switch between your personal account and your organizations. Click **"Manage Members"** to add or remove team members at any time.
## Step 5: Manage Your Organization
You're now in the organization dashboard. Use the account switcher to switch between your personal account and your organizations. Click **"Manage Members"** to add or remove team members at any time.